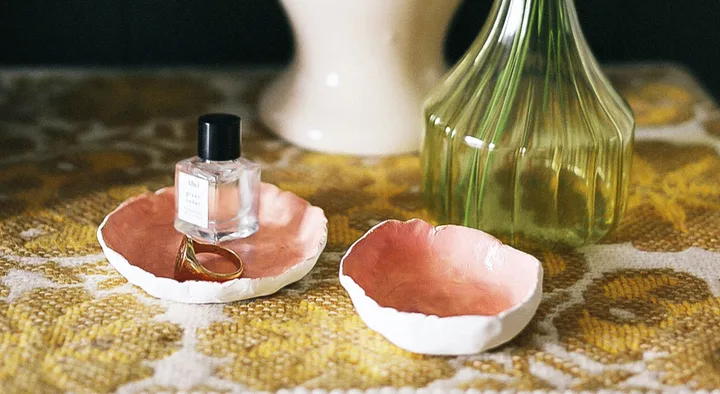
Bowl everyone over with your creativity and keep things tidy with these hand-crafted clay containers

These sweet, little rustic pinch bowls are easy to make and come in handy for holding all kinds of things. I love their forgiving, imperfect form and the many possibilities for creativity. I also find the making process to be calming and therapeutic. Let your mind focus on the organic process of creating something handmade. It’s the perfect project to put the busyness of life aside, even just for a little while.
Made with air-drying clay, these bowls are an excellent introduction to making pottery at home as the clay cures naturally on its own without having to be baked in the oven or in a kiln. It also comes in various colours and is relatively simple to handle. I used the Jovi brand, which is available from most stationery, craft and hardware stores, including The Warehouse and Spotlight. Not only do they make lovely gifts, there’s a plethora of other beautiful things you can create using this inexpensive medium.
How to make clay pinch pots
1 First, start by laying some baking or regular paper on your work surface to protect it from mess.
2 Start with a small piece of clay and roll into a smooth ball using your hands.
3 Next, gently press your thumb into the centre of the ball to create an opening, allowing at least 0.5cm at the bottom to create the base of the bowl.
4 Using careful pinching motions, slowly shape into bowl form while working in a circle to keep the bowl somewhat even all the way around. Ensure the bowl still has a relative thickness (at least 0.5cm) to stop it from cracking when it dries. You’ll find out the best thickness through trial and error – this is the fun part.
5 Once you’re happy with your creation, place the bowl in an undisturbed location to harden. Most
of the manufacturers’ instructions will say for up to 24 hours, but I find it takes a little longer to set completely.

A few ideas for getting creative with your bowls
- Emboss the creation with lace or by pressing certain items onto the surface of the clay while it is still soft. You can also carve out lines, dots or grooves using a toothpick or other household items.
- Consider what household items can be used to shape the clay into different designs. For example, a patterned glass bowl or small egg cup might create a lovely interior pattern for your clay when shaped around the outside of the vessel. Just be sure to keep your clay at least 0.5cm thick to prevent it from cracking when you gently remove it afterward.
- Once the clay is dry, you can experiment with different paints. I used nail polish to create a soft pink hue inside my bowls; however, acrylic craft paint also works well. Something to note is that unless the pots have been glazed with varnish, they cannot be used for food or liquids.
Words and photography by: Eleanor Ozich
Related stories
Native ad body.

Native ad body.


Native ad body.