The Japanese method of wrapping plants in moss, soil and string is easy, addictive and beautiful. In this extract from Hanging Kokedama by Coraleigh Parker, we discover how to get started
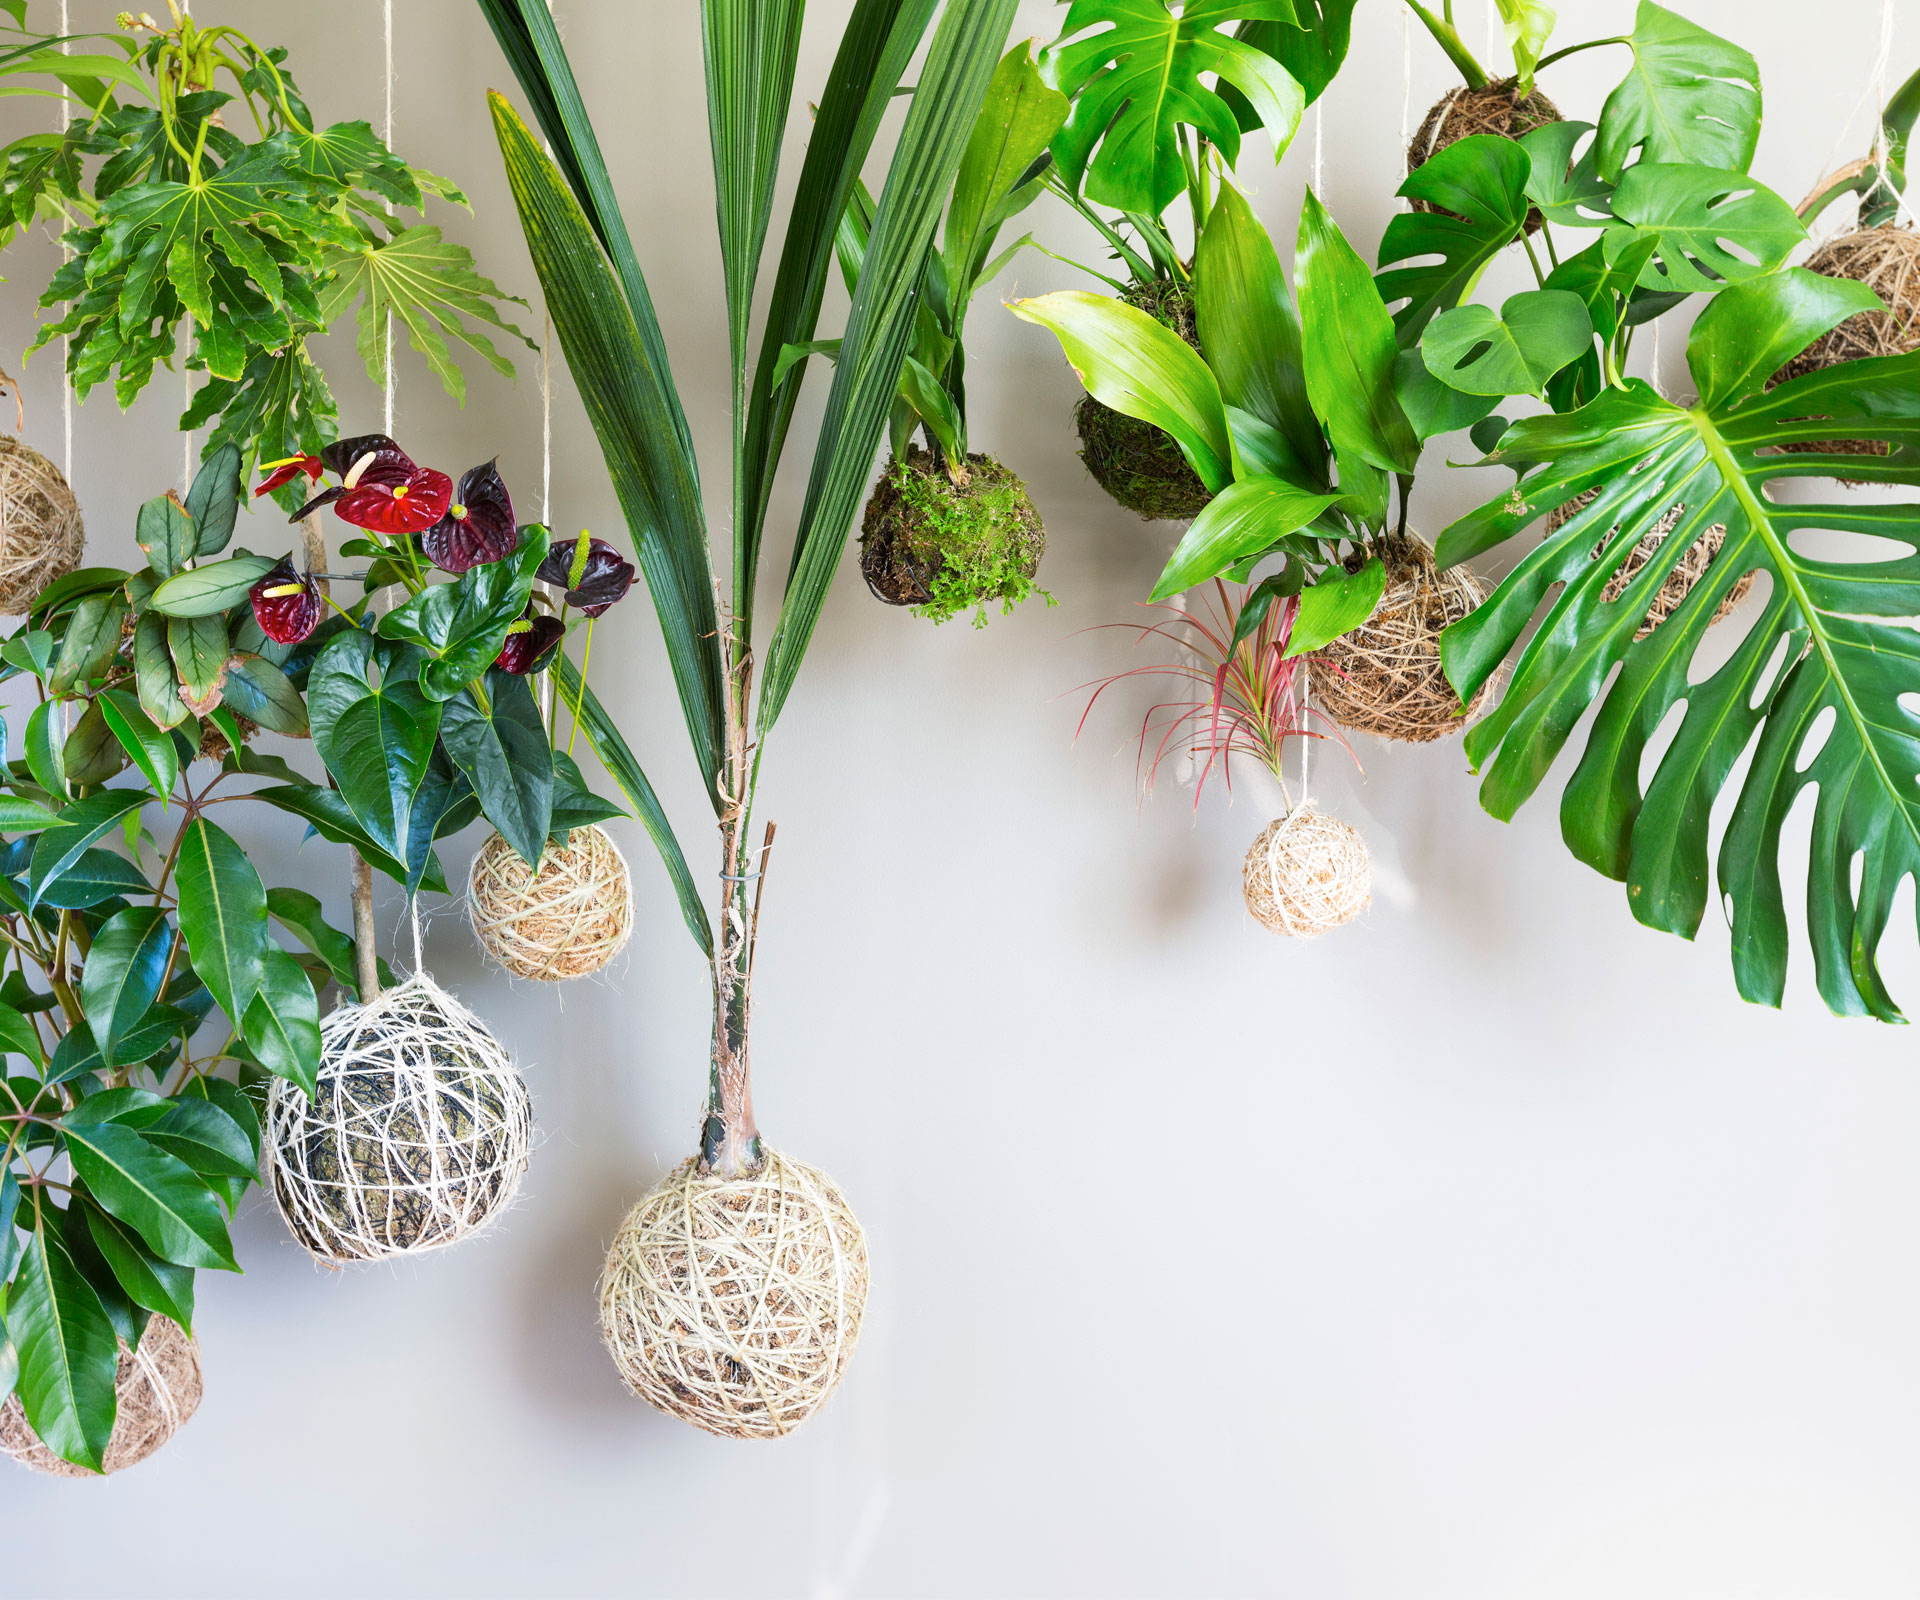
Use this step-by-step guide to make Japanese inspired hanging Kokedama
There is something intrinsically inviting and soothing about the form of kokedama, through the juxtaposition of its controlled and wild aspects. It is a manifestation of wabi-sabi, or the Japanese art of finding beauty in imperfection. All the elements which keep bonsai from falling into obscurity are also present in kokedama, but in a much more accessible format.
Economical design, which seeks to use a minimum of components, along with displaying natural processes and naturally occurring objects, is becoming increasingly mainstream. As more people choose to see the beauty in the roughness of nature, the room in their lives for meaningless clutter diminishes.
As a hobby, the art of making kokedama is as rewarding as it gets. The act of putting our hands in direct contact with natural materials grounds us. The wrapping process is very meditative; the action requires bilateral coordination – that is, to use both hands simultaneously and independently. And because both hands are required to wrap, and each must perform separate and independent actions, it is very difficult to think about anything else. One becomes completely present in the moment.
Many amateur kokedama artists use the art as a way to unwind after hectic days at work, or frenetically busy periods in their lives. The action of making a kokedama provides a small haven of tranquillity and peace that centres one’s energy back into the body and self.
Kokedama evolved from the nearai style of bonsai, which includes exposed roots as part of the aesthetic. Normally they are grown in a pot for such a long period of time that their roots completely fill the pot and they can be removed and displayed without harming the tree. To stop the roots from drying during the transformation or root-ageing process, moss is placed over the roots to cover and protect them.
The main difference, though, between a pot and a kokedama is the way the roots respond. In a pot, the roots always encounter water so they continue to grow. In a kokedama, however, the roots which come to the outside of the ball encounter air. If the air is dry, the roots stop growing. Instead of using long, fat roots to explore for water, the plant grows many fine roots within the ball.
You will probably gain more pleasure from your kokedama, and observe their needs best, if you assume that plants are people, too: try to love them like you would a friend or a pet. Get to know your plants. Don’t expect them to give you something for nothing. When you give your plants the attention they need, they will happily reciprocate by giving you beautiful green goodness to look upon. They will gladly fill your life with tranquillity and peace.
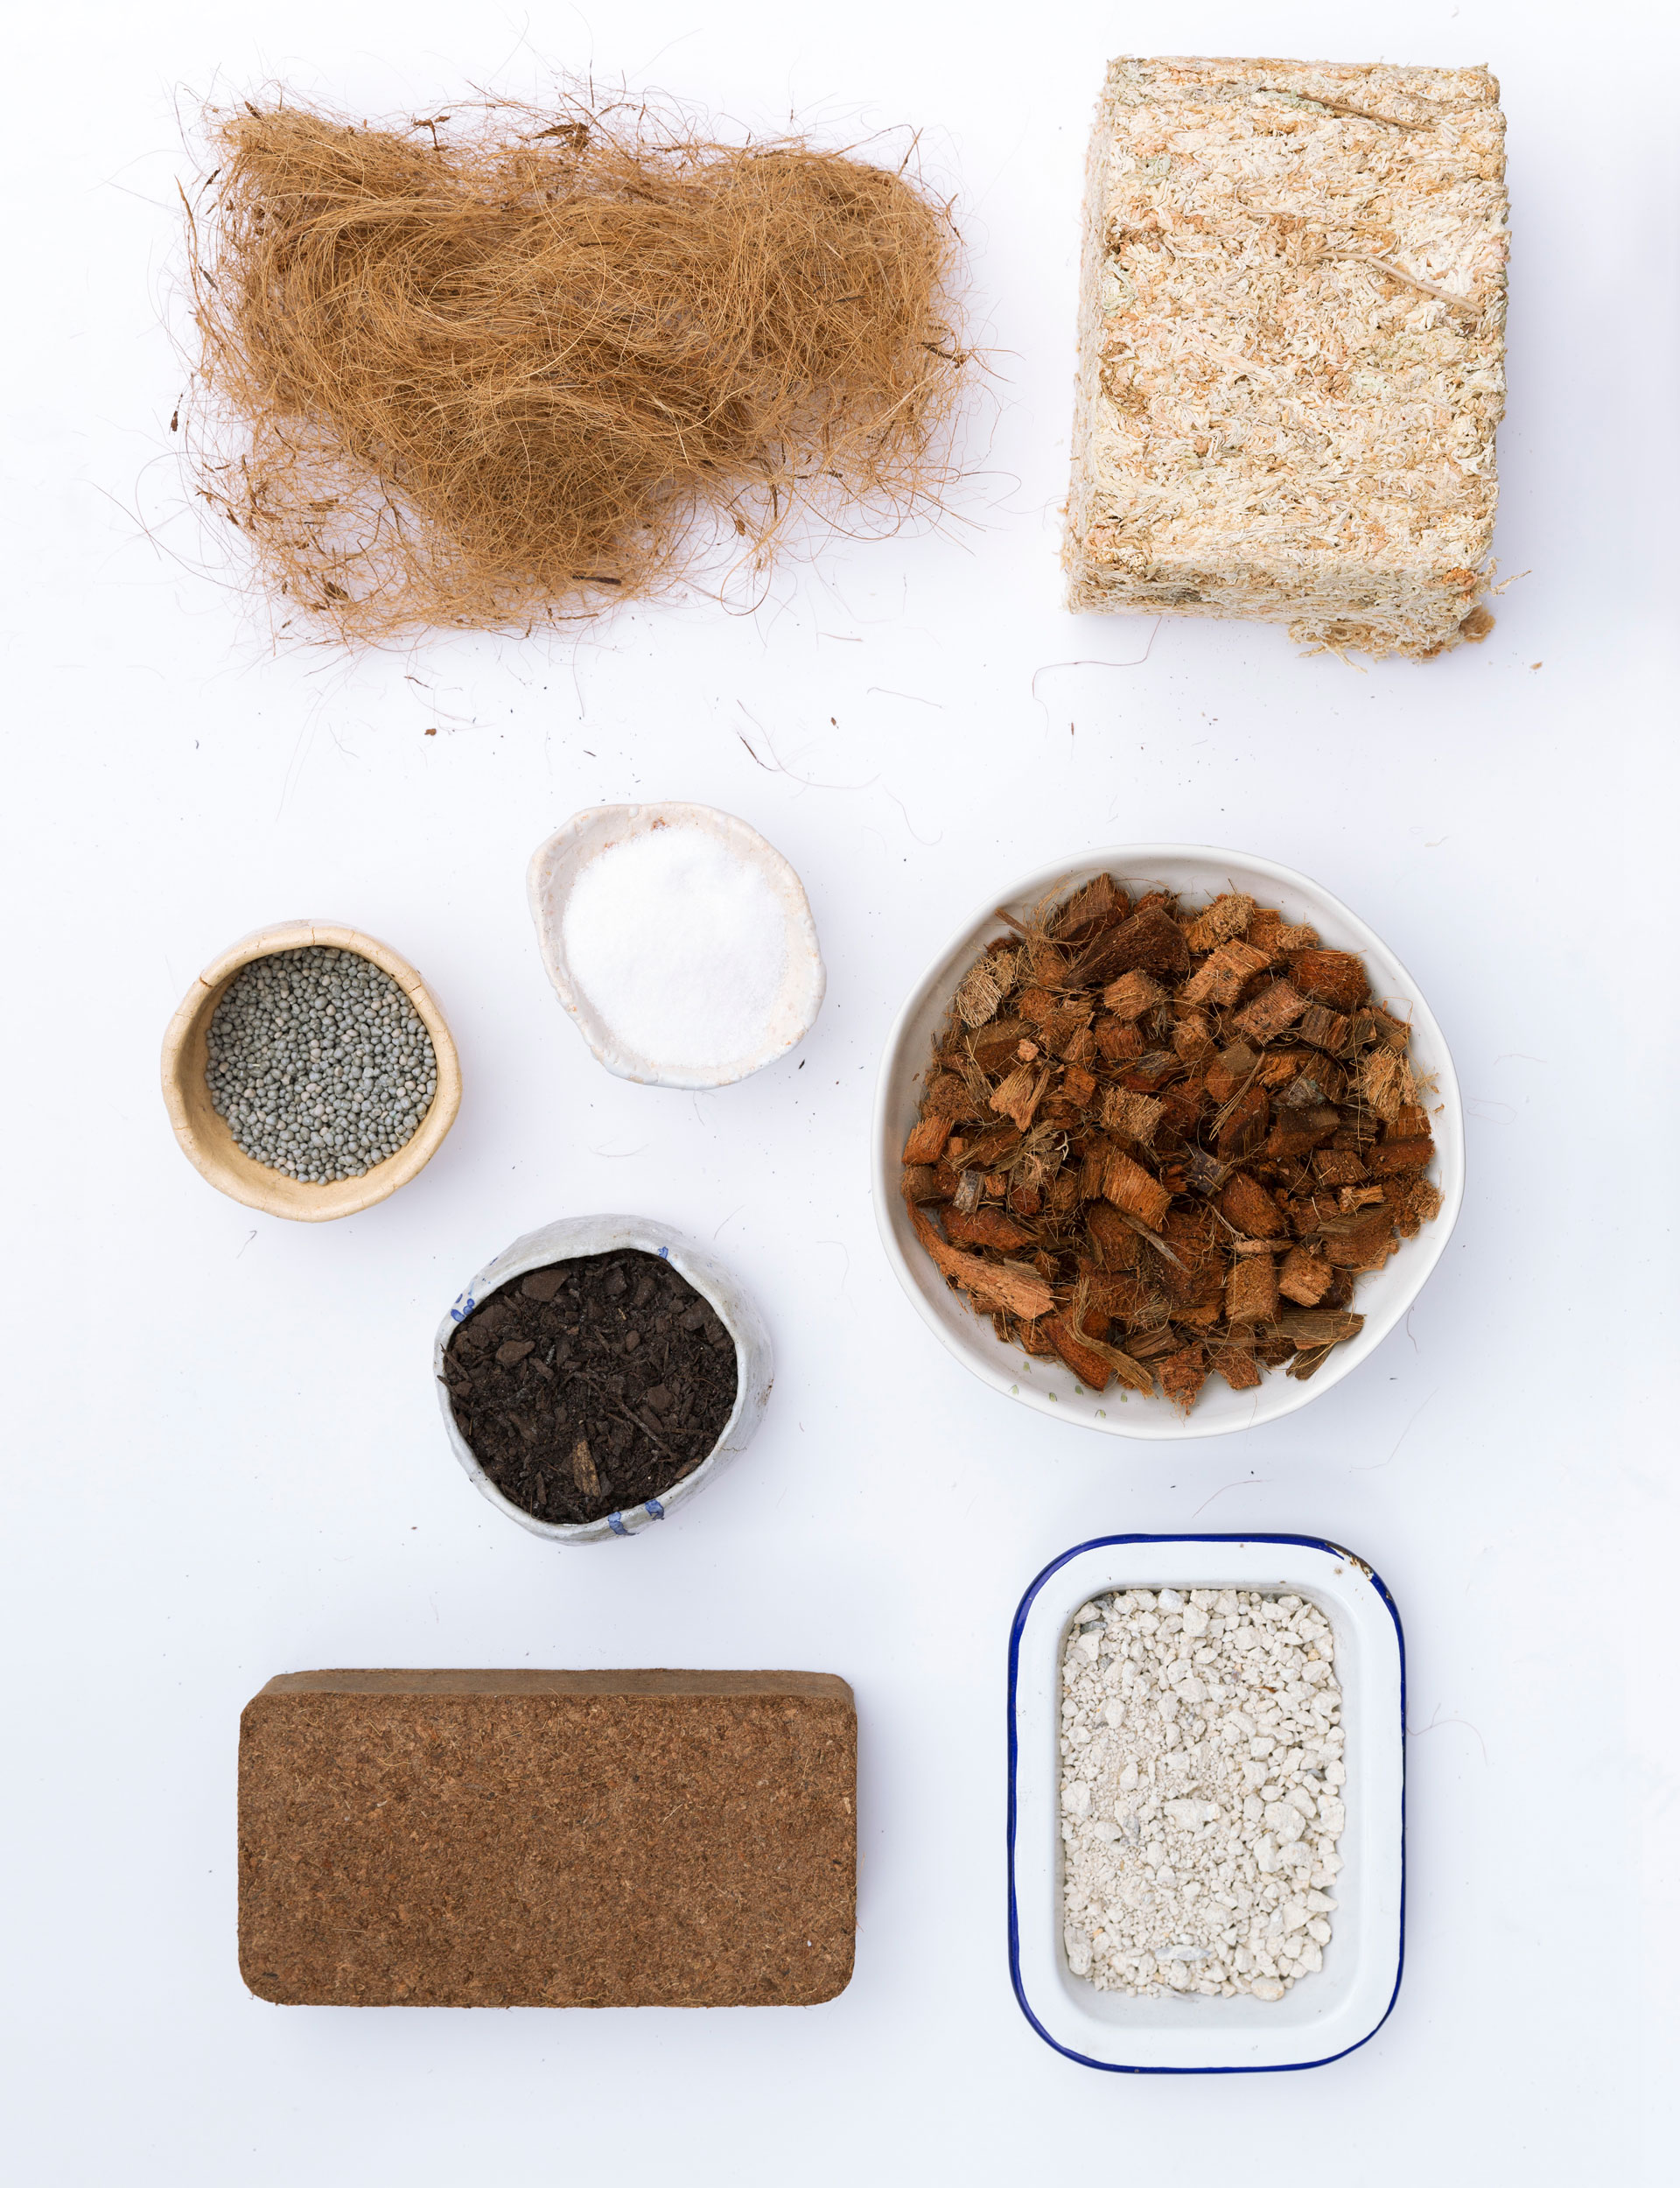
Types of soil
The soil is by far the most important part of making kokedama as the right recipe will allow your plant to thrive, even in its restricted environment. Hanging Kokedama offers soil recipes for all types of plants, but a good place to start is with good-quality potting mix, compost or bonsai soil. As you gain confidence with kokedama, you may like to make your own soil mixtures which could include:
Slow-release fertiliser – if there’s a steady source of moisture and food, your plant will happily grow roots without striving for other nutrients. Subsequent feeding will be required.
Coconut husk chips – use for plants that need air around their roots and prefer humidity over liquid moisture, such as epiphytes.
Coir dust – coir retains and releases water slowly, making it ideal for plants that prefer damp conditions.
Water crystals – these absorbent crystals act as tiny water reserves within the ball. Soak them first before adding to your soil mixture.
Perlite – this porous substance allows soil to drain by moving water downwards and creating pockets of air, which is ideal for drought-loving plants.
Coconut fibre – for plants that don’t require frequent watering or dislike fluctuating moisture levels, an extra layer of coconut fibre wrapped outside the sphagnum moss can help to hold in humidity.
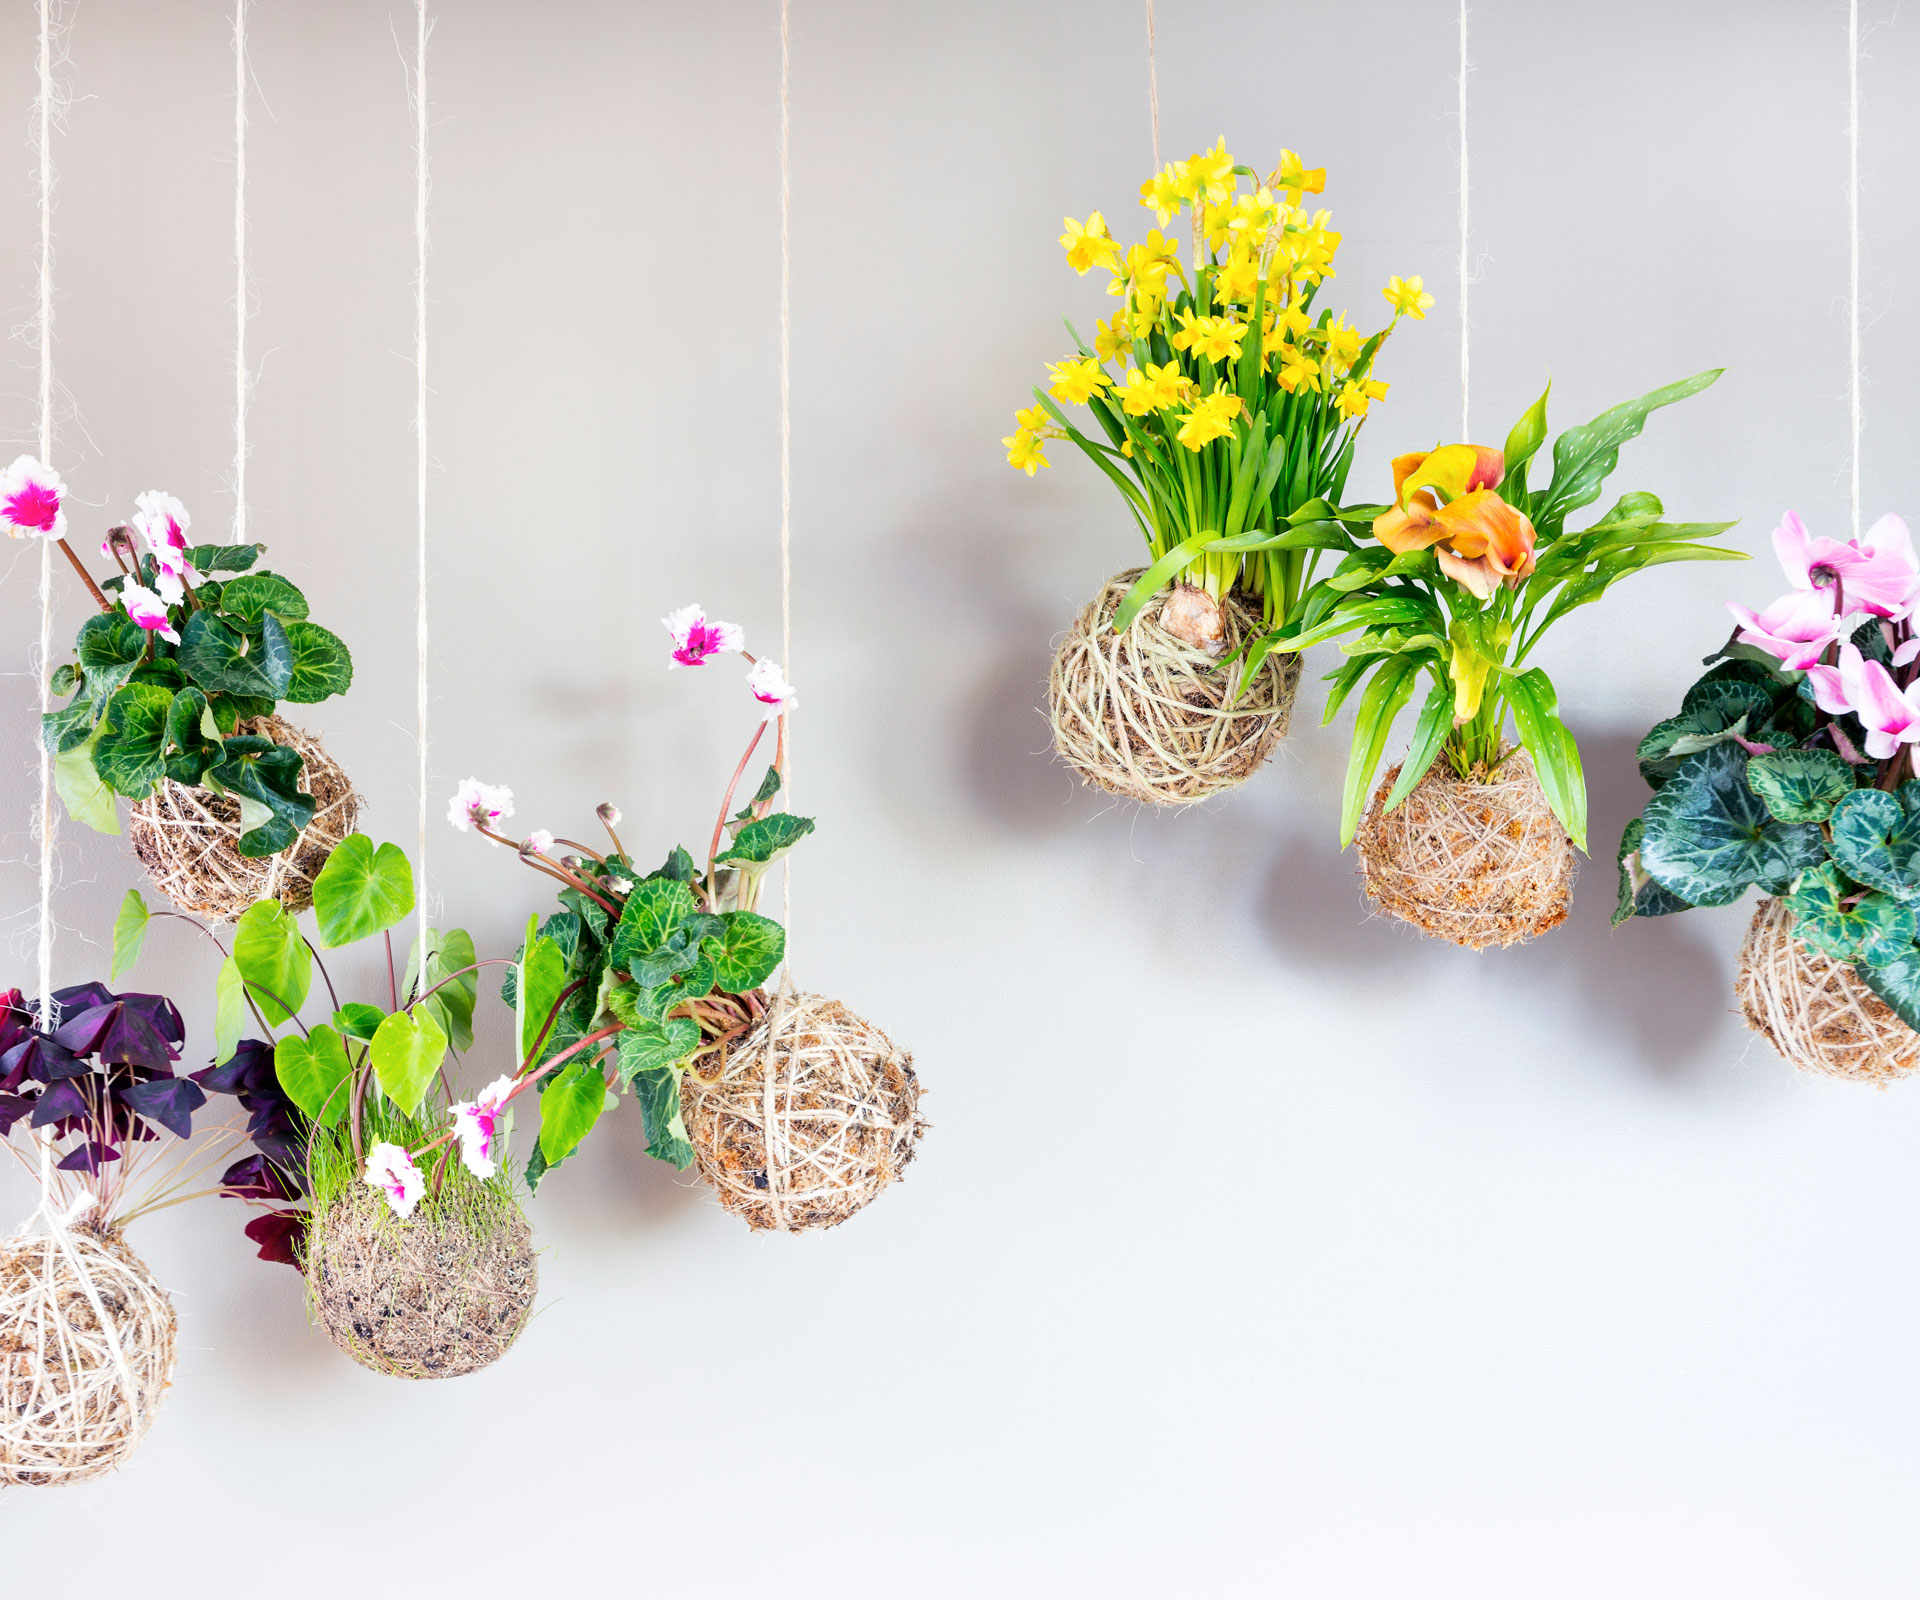
Types of plants
Succulents & cacti – these are the best plants to use when you’re learning the art of kokedama. Cacti in particular don’t mind being handled, so if your early attempts don’t quite work out, you can start again.
Tropical plants – larger plants such as monstera and anthurium can make amazing kokedama but do require some skill to put together. They also require lots of water and a humid habitat to thrive.
Epiphytes – in the wild, these plants grow on rocks or on other plants or trees. Their aerial roots make them ideal subjects for kokedama. The trick is to keep these plants, which include orchids and staghorn ferns, at the optimum level of dampness.
Ferns – these beautiful plants like lots of water so require dense, water-retaining soil and a thick layer of moss. Even then, they’ll need frequent misting and soaking. Your reward will be thick displays of glorious foliage.
Herbs – woody stemmed, perennial herbs are best for kokedama as those with rapid, lush growth will need too much care to be worthwhile. Oregano, rosemary and thyme are ideal.
Bulbs, corms & tubers – flowers that grow from bulbs can be temporarily displayed as kokedama and make a spectacular feature. The bulbs can then be returned to your garden until the following year.
Tree & shrubs – this type of kokedama is demanding but the result can be truly stunning. Trees need lots of water, time outside and frequent rebinding as they grow. Try it with Japanese maple, Meyer lemon or olive trees.
Sphagnum moss
It is very important to wrap a thick layer of sphagnum moss around your kokedama – thick enough to provide protection from evaporation. If the layer is too thin, the moss will suck the moisture from the soil as its surface dries. There is no such thing as too much moss!
Wrapping styles
‘Evenly random’ is a great technique for beginners, and requires that string is coiled consistently over the entire surface of the ball, in no particular pattern. Another easy one to try is the 2-7 technique. Imagine a clock face on your kokedama. Start at two o’clock and wind towards seven o’clock. Rotate the ball a fraction and repeat. This results in a symmetrical pattern. There are many variations on wrapping; this step is limited only by your imagination.
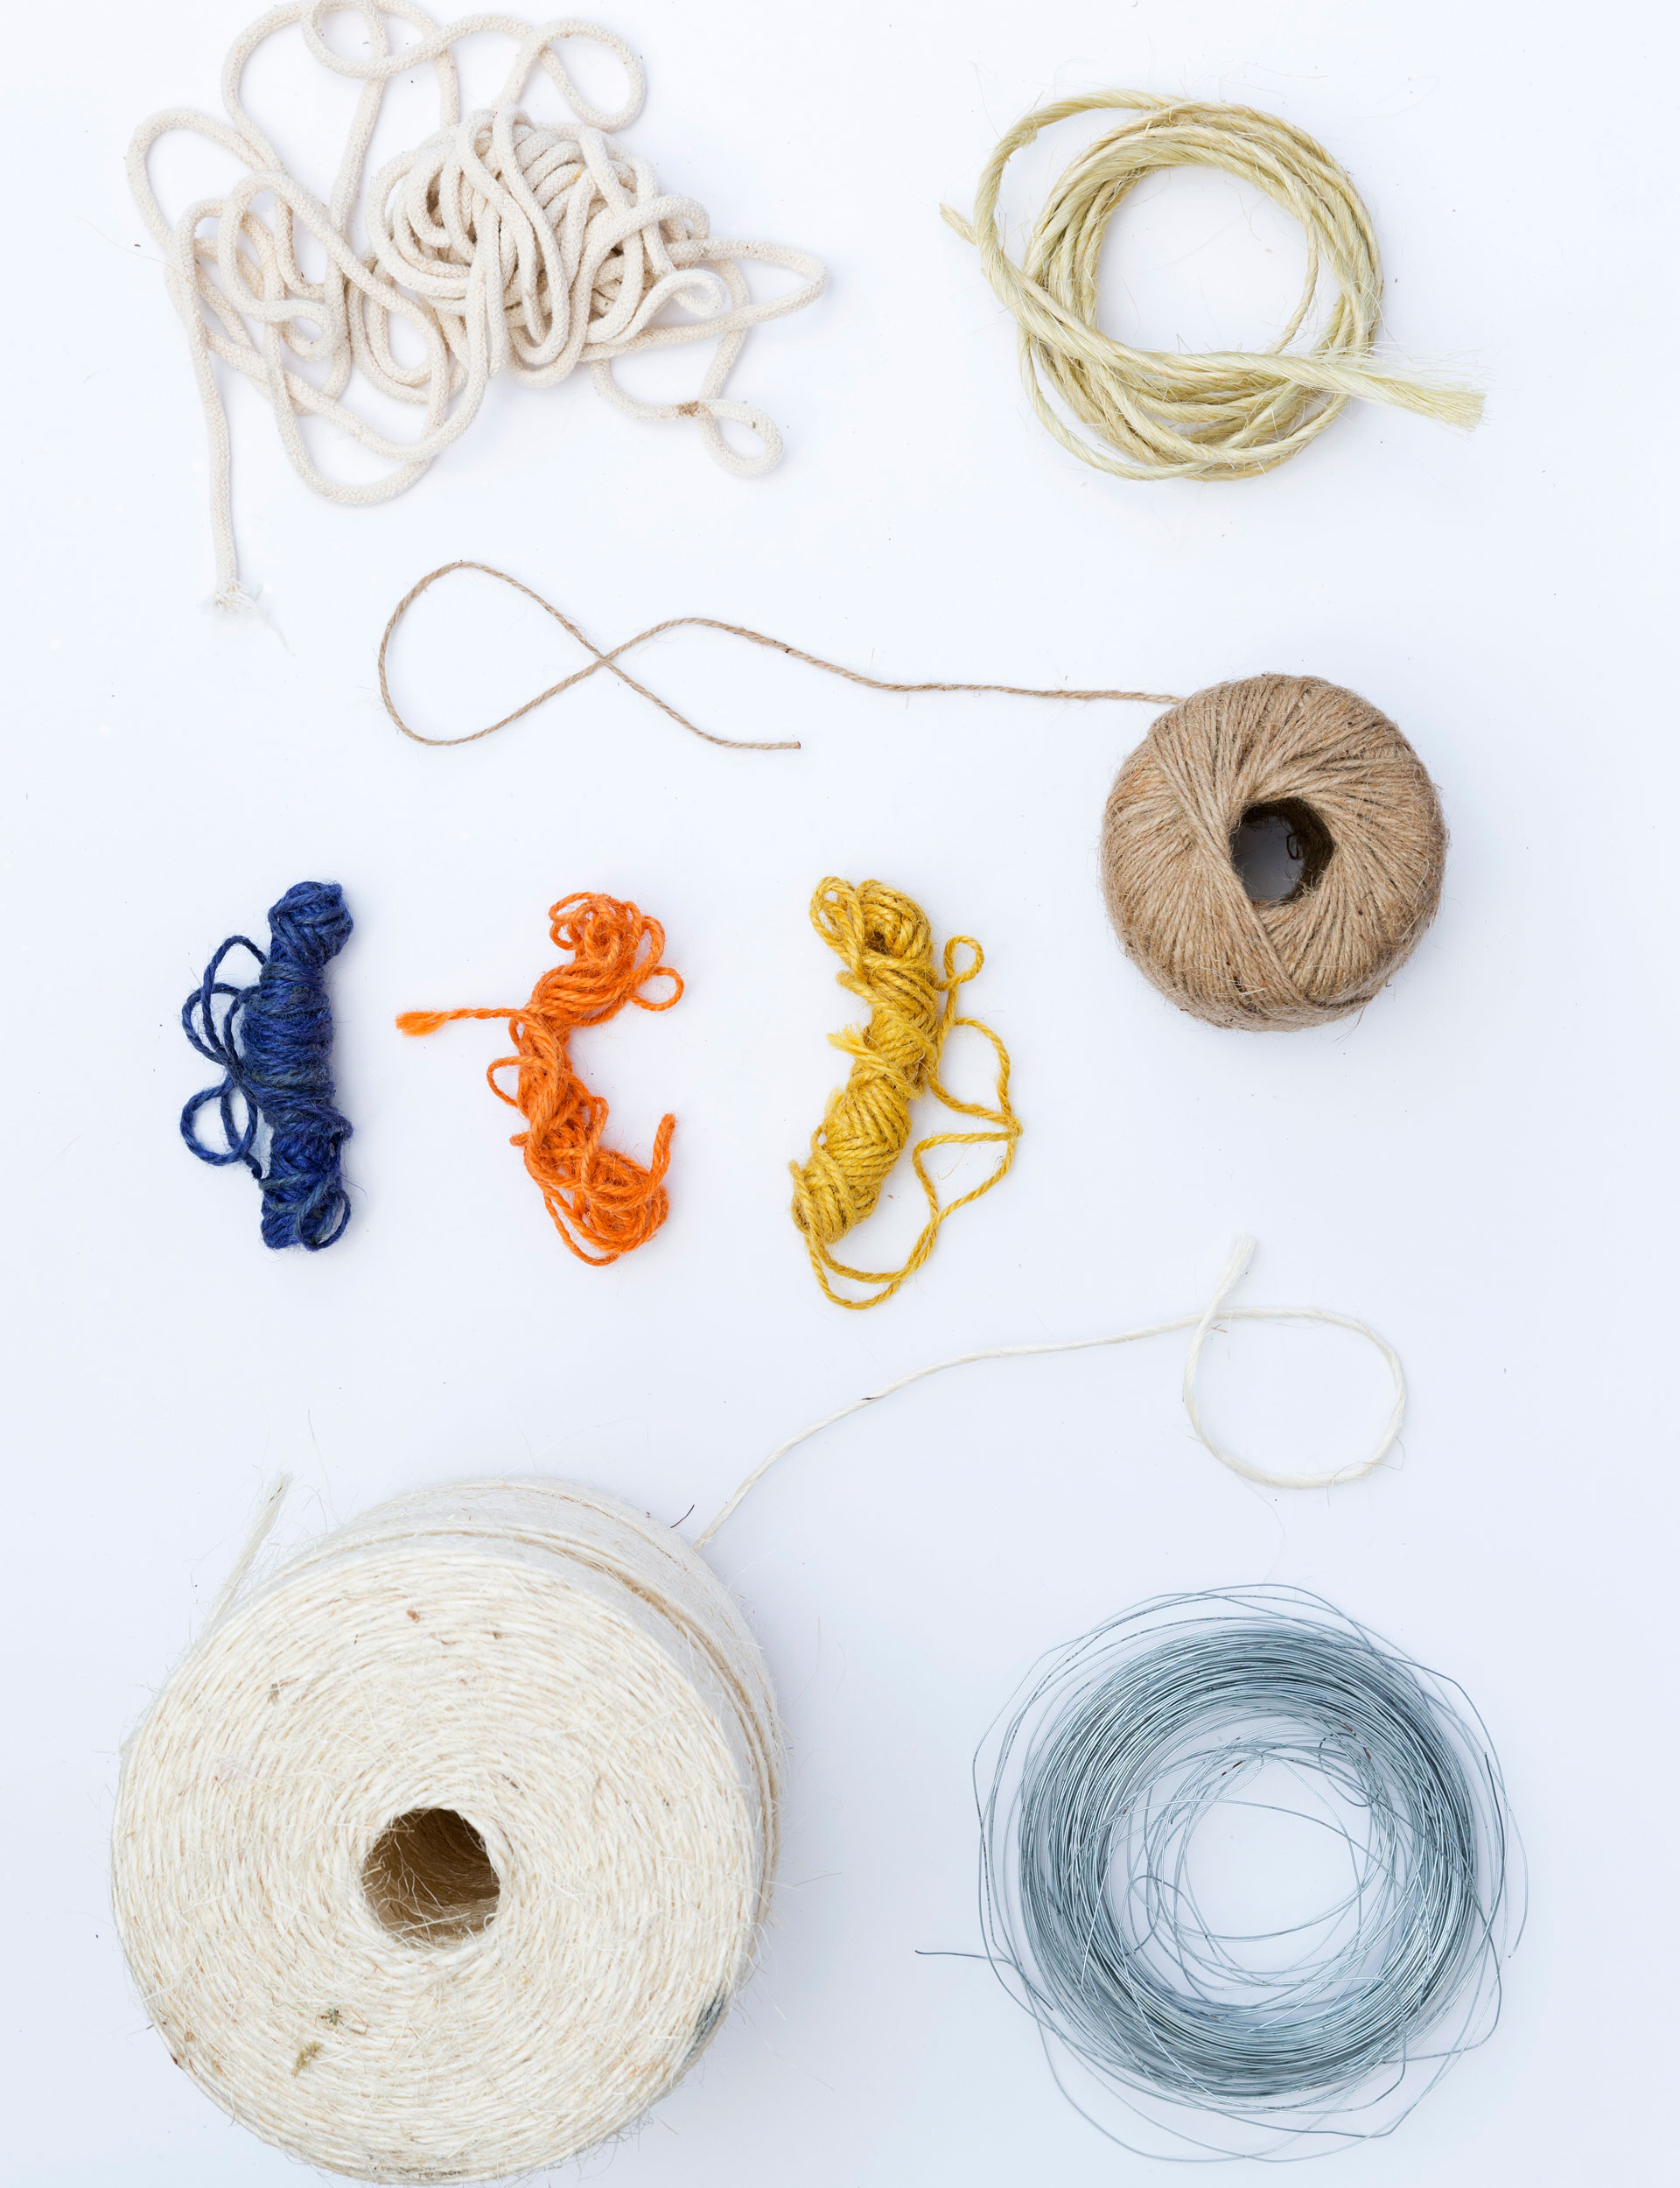
Wrapping options
The type of string you use to wrap your kokedama will depend on the type of plant you select, or vice versa. Natural string will degrade over time as the contact with moisture will cause decomposition. Plants that stay wet, such as ferns, will need synthetic string which doesn’t degrade, so some type of nylon twine will be best – wrap with nylon first, then cover with natural twine to achieve an organic aesthetic. If you want a more industrial look, use soft wire to hold the ball together.
Hanging options
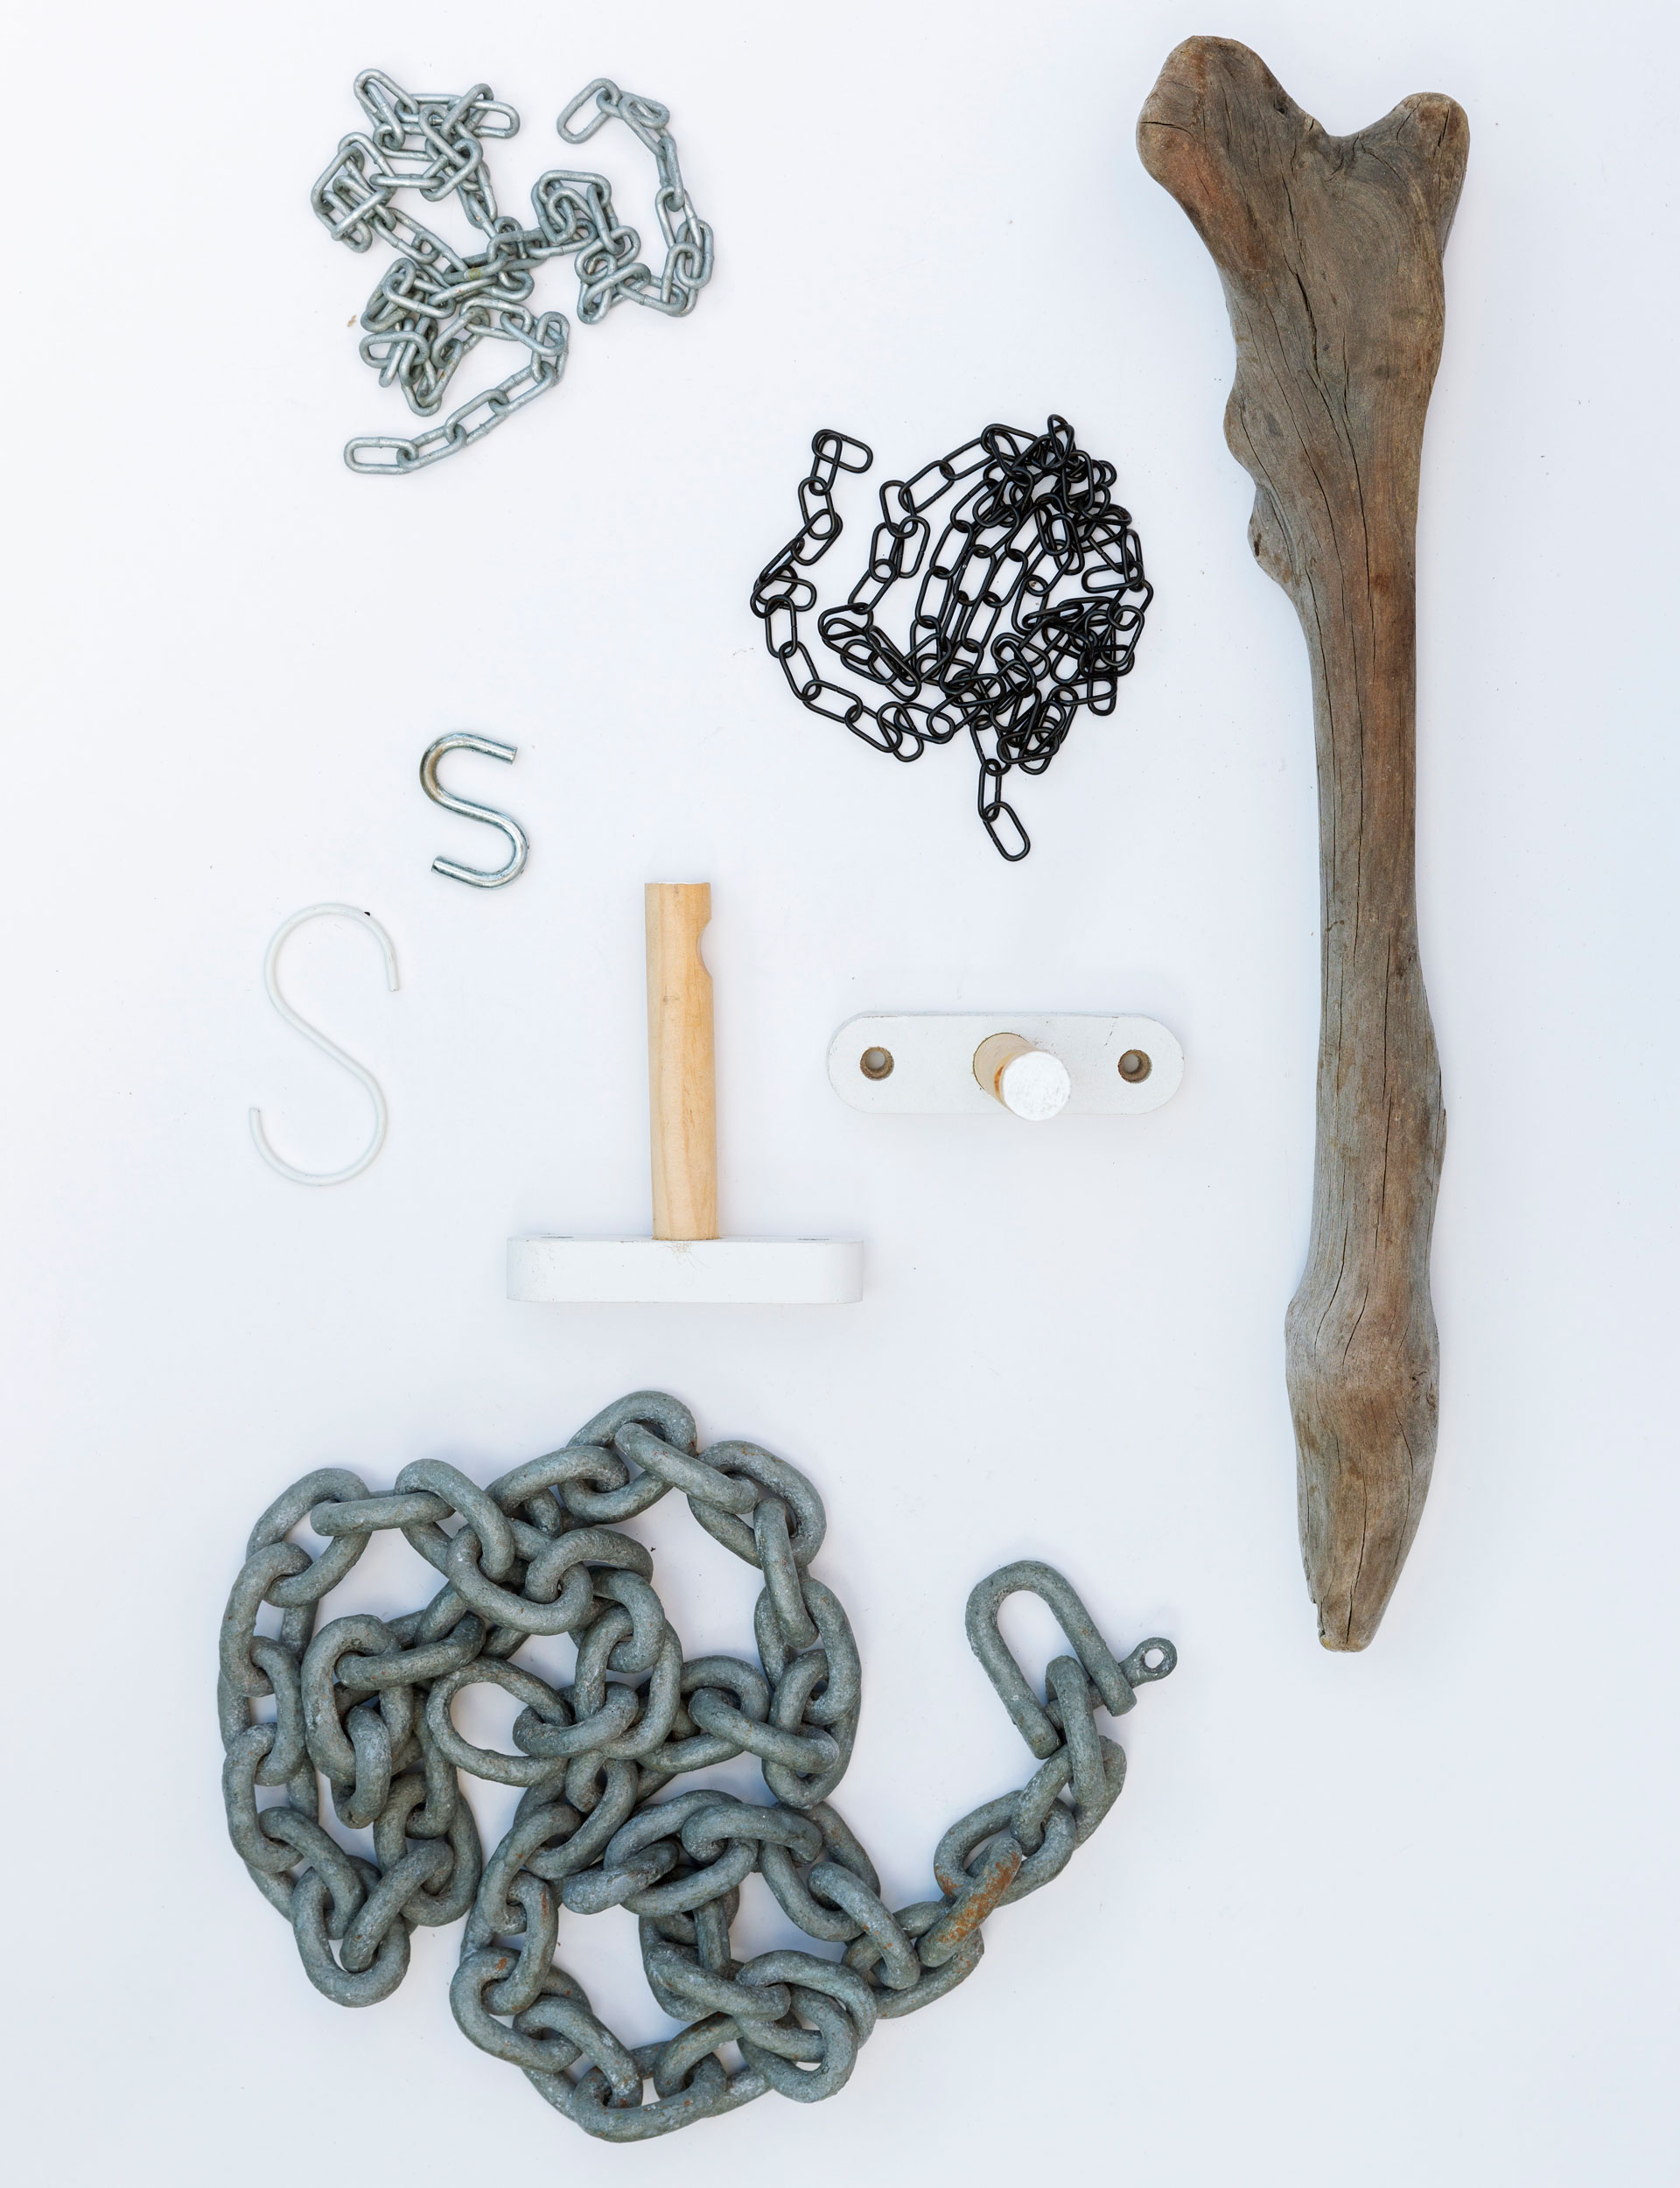
The easiest way to hang your kokedama is by fixing a hook to a wall or ceiling. You can also hang kokedama along the length of chain or a suspended branch. Or try suspending a pole or bar across a window and use this to display various kokedama. To attach them, make a loop around the ball or tie string to three sides. Alternatively slip a hook under the wrapping. Very small ‘S’ hooks used for hanging curtains are a great way to hang kokedama from small chains without detracting from the silhouette.

1/12
Remove plant from pot and carefully loosen roots. Try not to cause too much damage as many plants are susceptible to root shock from overhandling.

2/12
Empty saturated sphagnum moss onto a work surface and form into a disc (like a big meat patty). Press the moss flat to compress into a pancake. Water will squeeze out so be prepared for mess.

3/12
Place your plant (and the soil around its roots) onto the moss pancake. Try to keep both plant and soil in the centre of the flattened moss.

4/12
Mix up the appropriate soil recipe for your chosen plant and add to the plant. If you have soil mixture left over, keep it in an airtight container to use next time.

5/12
Slide your hands underneath the pancake on both sides of the plant and lift up like a taco to cover the root ball. Gather in the remaining moss to completely cover the root ball and soil.

6/12
Compress the moss into a covering all around the plant. Don’t be shy – you can squish it fairly firmly without damaging the plant. The firmer you get the moss now, the easier the next part will be.

7/12
Tie a ‘belt’ around the centre of your ball with one end of a ball of string. Make a knot so you have an anchor to start twining from. Tie as tightly as you can without chopping the ball in half.

8/12
Tilt the ball up carefully so you can loop string all the way over and under. These first loops don’t need to look pretty; they are just to hold it all together.

9/12
Coil the string around the ball in an evenly random pattern. Maintain firm pressure on the string; try to compress the moss as you wrap. Use the edge of a table so the leaves don’t get crushed.

10/12
Press down firmly and roll the ball back and forth to make it round. Pat down to shape it all over. Do this before you finish wrapping or you may end up with saggy string. Add more string to consolidate the shape.

11/12
Poke the end of the string back into the ball using closed scissors. Tuck the string into the ball in an opposite direction to secure it.

12/12
Trim any hairy bits sticking out from the ball or any stray moss.
Photography by: Larnie Nicolson.
EXPERT PROJECTS


Create the home of your dreams with Shop Your Home and Garden
SHOP NOW


