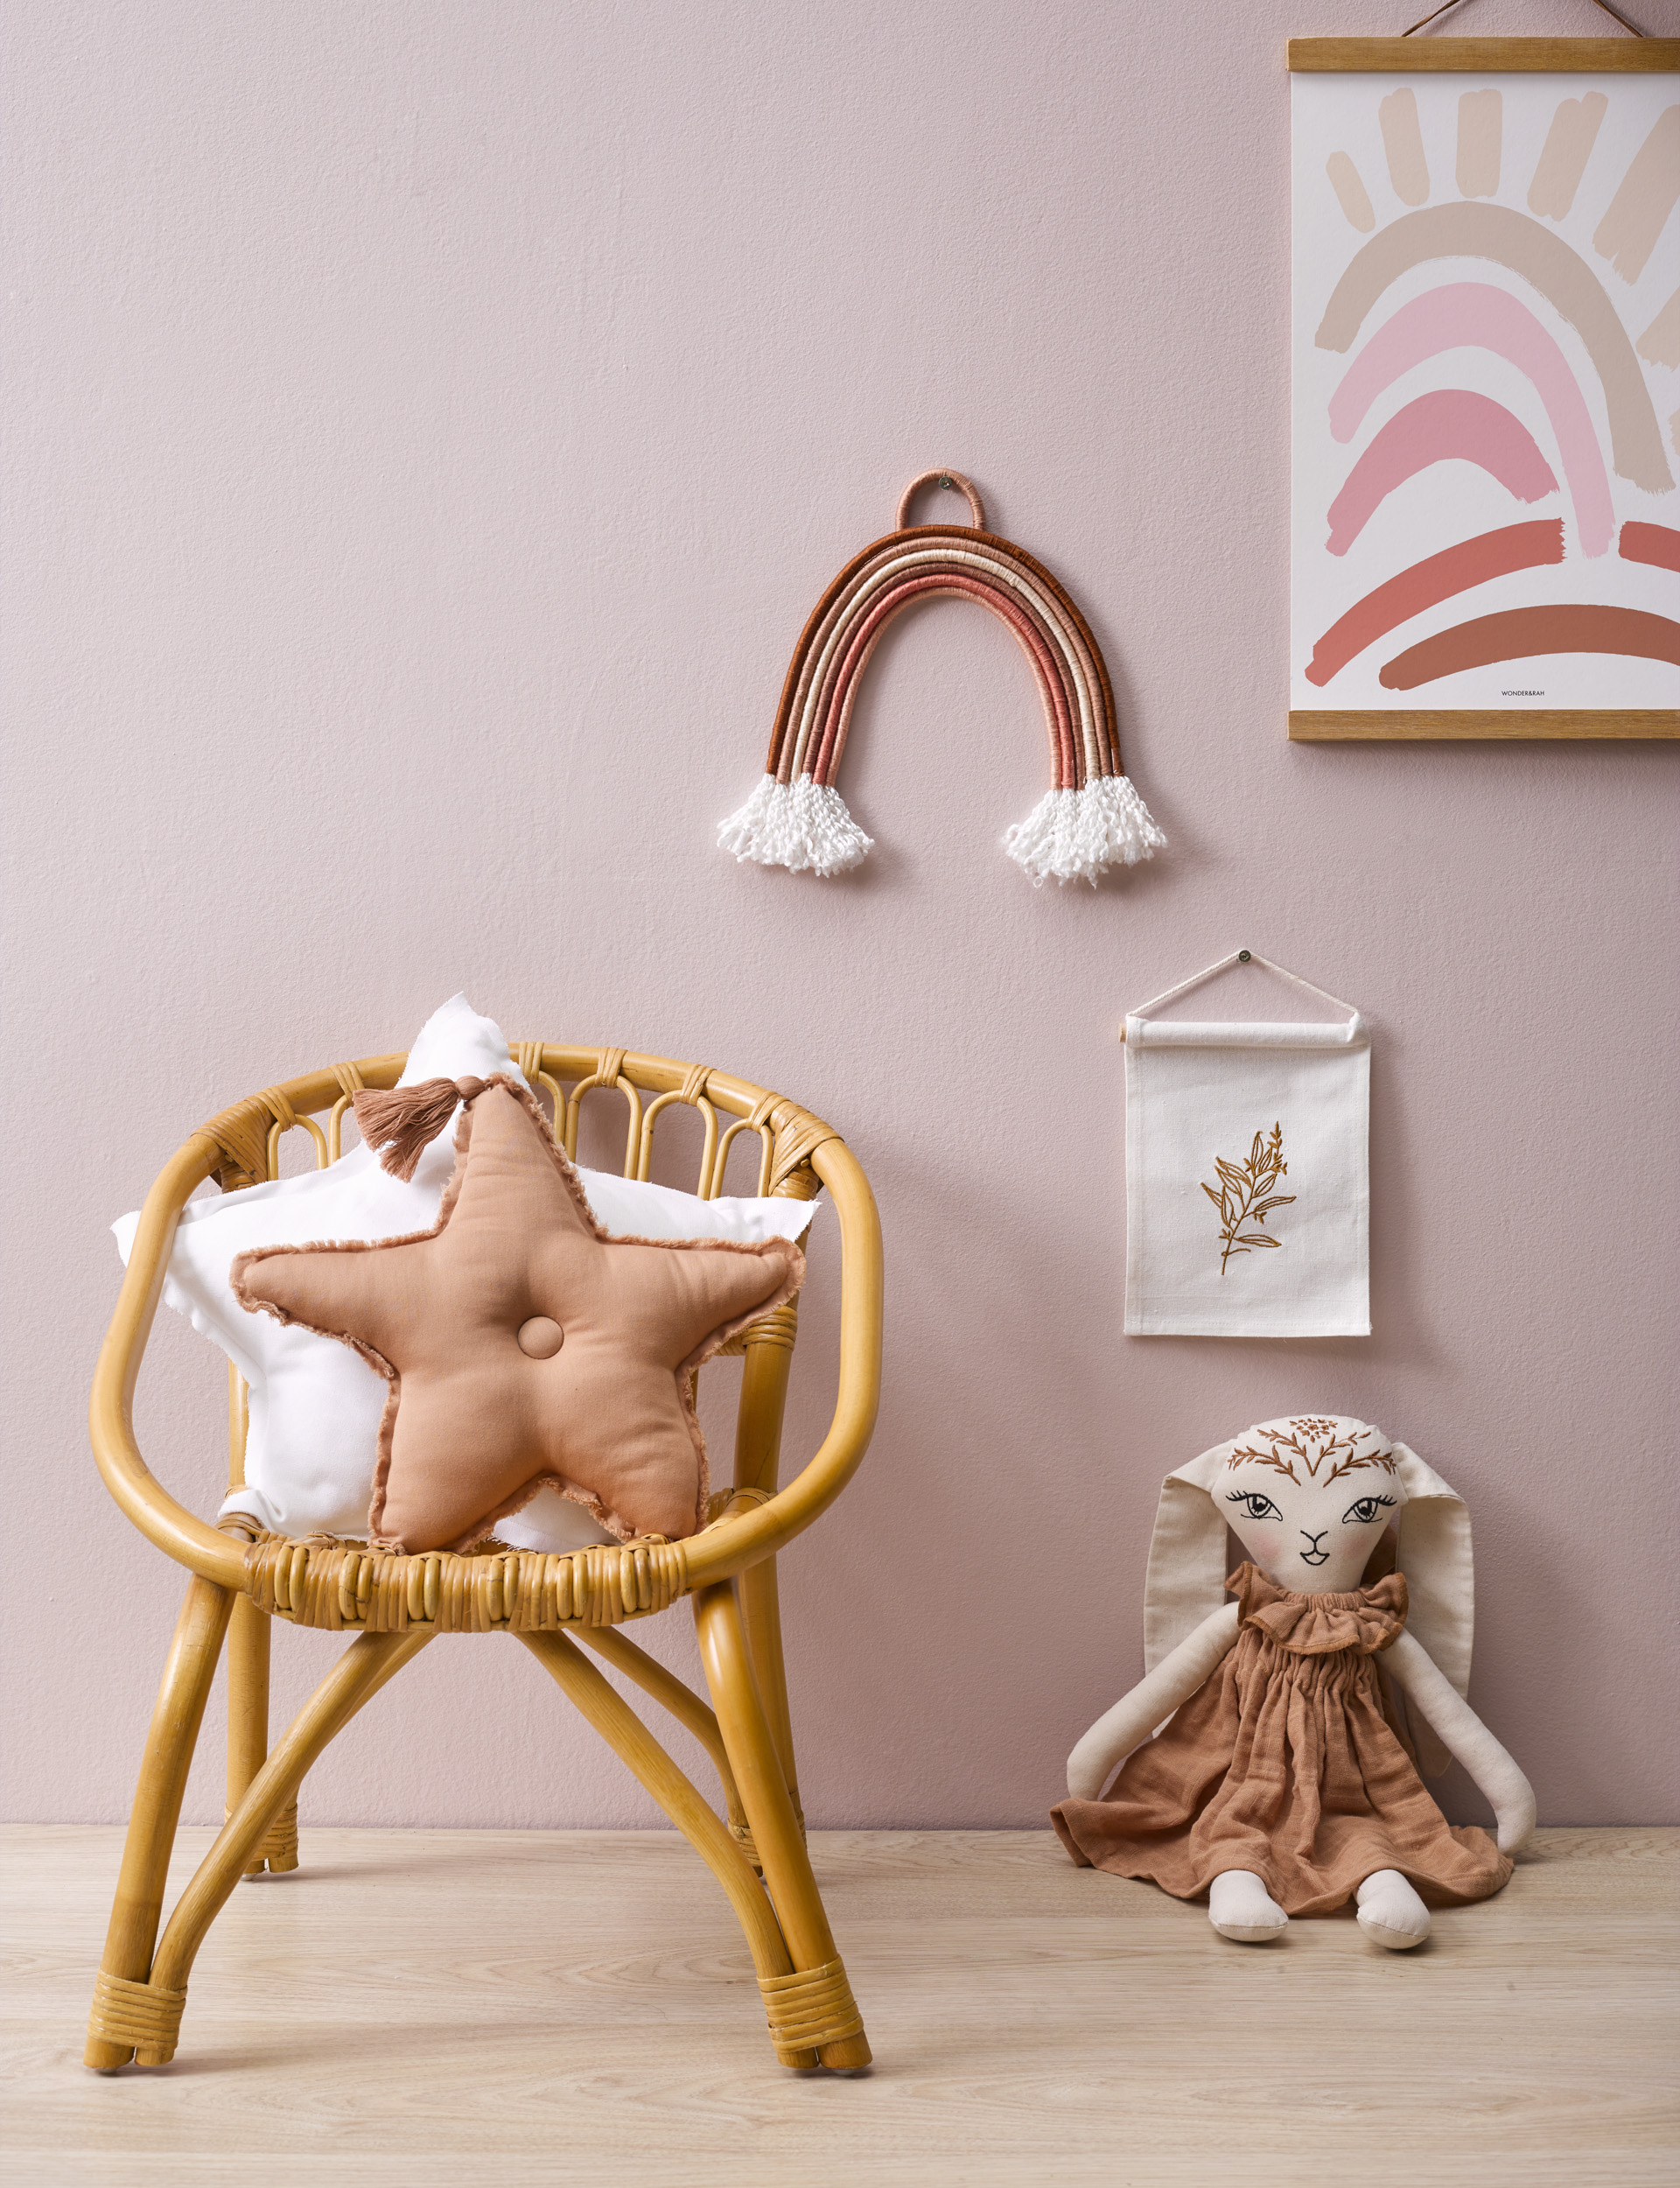
This rainbow wall hanging makes a cute addition to a child’s bedroom – just pick your favourite colours
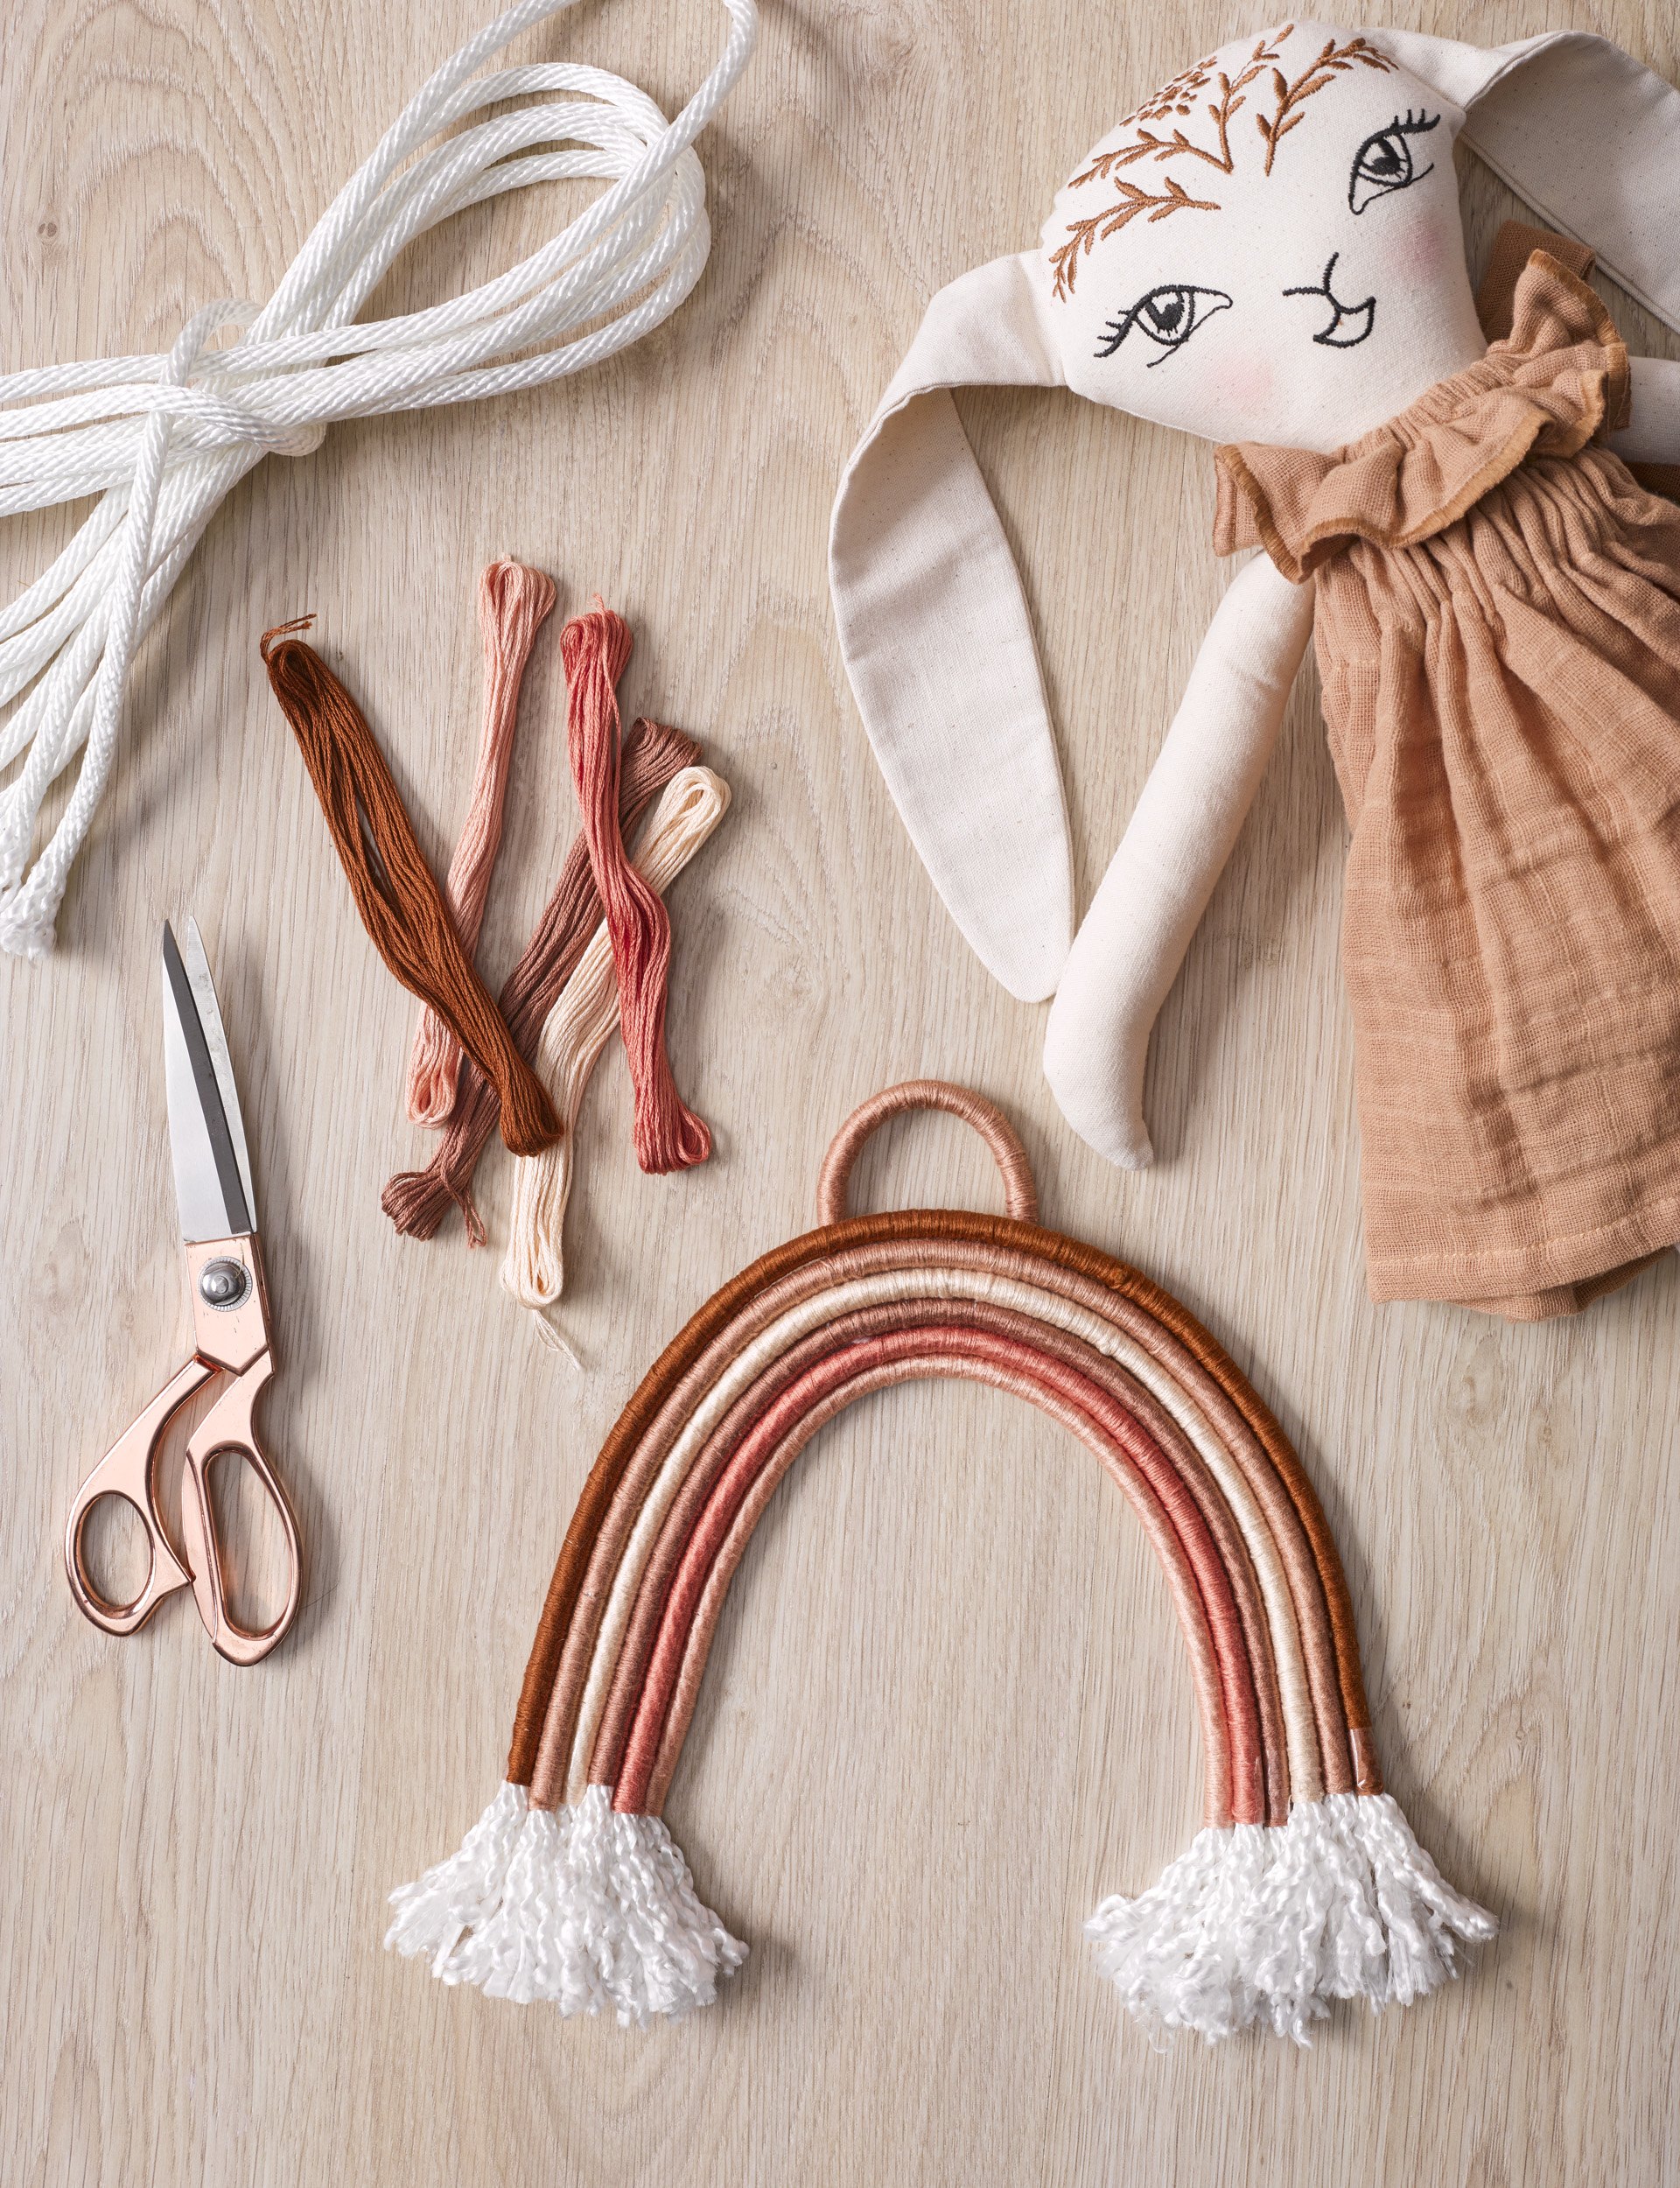
You will need
- 3.15m rope or thick cord (about 1cm in diameter)
- Scissors
- 12 skeins embroidery thread in 6 colours (2 of each colour)
- Darning needle
- Cotton
Instructions
Step 1 Cut a 15cm length of rope and set aside – this will be the hanger. Divide the remaining rope into 6 x 50cm lengths.
Step 2 On a flat surface, make a rainbow shape by stacking the 6 pieces one above the other. Trim so ends are level with each other.
Step 3 Decide the order of your colours from the outer to the inner rope of the rainbow.
Step 4 Starting 5cm in from the end of 1 piece of rope, tie on the embroidery thread in your chosen colour with a knot. Then wind it along the length of the rope, stopping 5cm before the end. Finish with a knot. You may need to tie off and start with a new skein in the same colour if you run out.

Step 5 Repeat step 4, using a different colour for each of the 5 remaining ropes of the rainbow. Fray the exposed ends of each piece by gently loosening the fibres with your fingers or a needle.
Step 6 Take the 15cm piece of rope and wrap thread around it in one of the 6 colours. You do not need to leave any space at the ends.
Step 7 Lay out your finished coloured ropes in the rainbow shape. Thread a darning needle with cotton and sew the pieces together. A tacking stitch is suitable for this as you will display the finished rainbow with the stitched side against the wall.
Step 8 Take the 15cm piece of rope and stitch it to the back of the rainbow in a loop then hang your handiwork on the wall.
Created by: Vanessa Nouwens. Photography by: Mel Jenkins.
This article was first published in Your Home and Garden. Follow YHG on Instagram, Facebook and sign up to the fortnightly email for inspiration between the issues.
EXPERT PROJECTS


Create the home of your dreams with Shop Your Home and Garden
SHOP NOW


